Test your Roblox game with RBXTester
RBXTester plays your game by itself and tells you whether it works. You write the check in plain English — “walk to the shop and confirm the sword costs 100 coins” — and it moves a real mouse and keyboard inside a Windows machine of its own, then shows you the screenshots it judged from.
The page has two halves. Steps 1–5 are setup, done once, top to bottom; most of it is waiting for a download. Steps 6–8 are everyday use — how to start it, how to run a test, and how to read what came back.
Windows will warn you before it runs
RBXTester is not code-signed. When you run the installer, Windows shows a blue “Windows protected your PC” box and hides the Run button behind a link. Click More info, then Run anyway.
That warning is about a missing signature, not about anything the
file does. If you would rather check the file than take its word for
it, the installer’s SHA-256 is below — compare it against
Get-FileHash RBXTester-Setup.exe.
Check the download yourself
Run the command below in the folder you saved the installer to. The two hashes must match exactly.
Get-FileHash RBXTester-Setup.exe -Algorithm SHA256
Before you start — you will need
- Windows 10 or 11, 64-bit. (A Mac or a Chromebook will not work.)
- About 30 GB of free space on one drive.
- Your Roblox account username and password, to type once.
- A Claude subscription — Pro or Max — that you use with Claude Code. This is what plays the game. More on that in step 4.
- A game of yours that is already published on Roblox. You will paste its web address in step 5.
Step 1 · about 5 minutesDownload the installer
-
Press Download for Windows at the top of this page.
You get one file, called
RBXTester-Setup.exe— about 240 MB. Windows will save it in your Downloads folder unless you tell it otherwise. That is the whole download; there is no account to make and nothing to sign up for. - When it finishes, Windows will show a blue box saying “Windows protected your PC” and the Run button will be hidden behind a link. Press More info, then Run anyway.
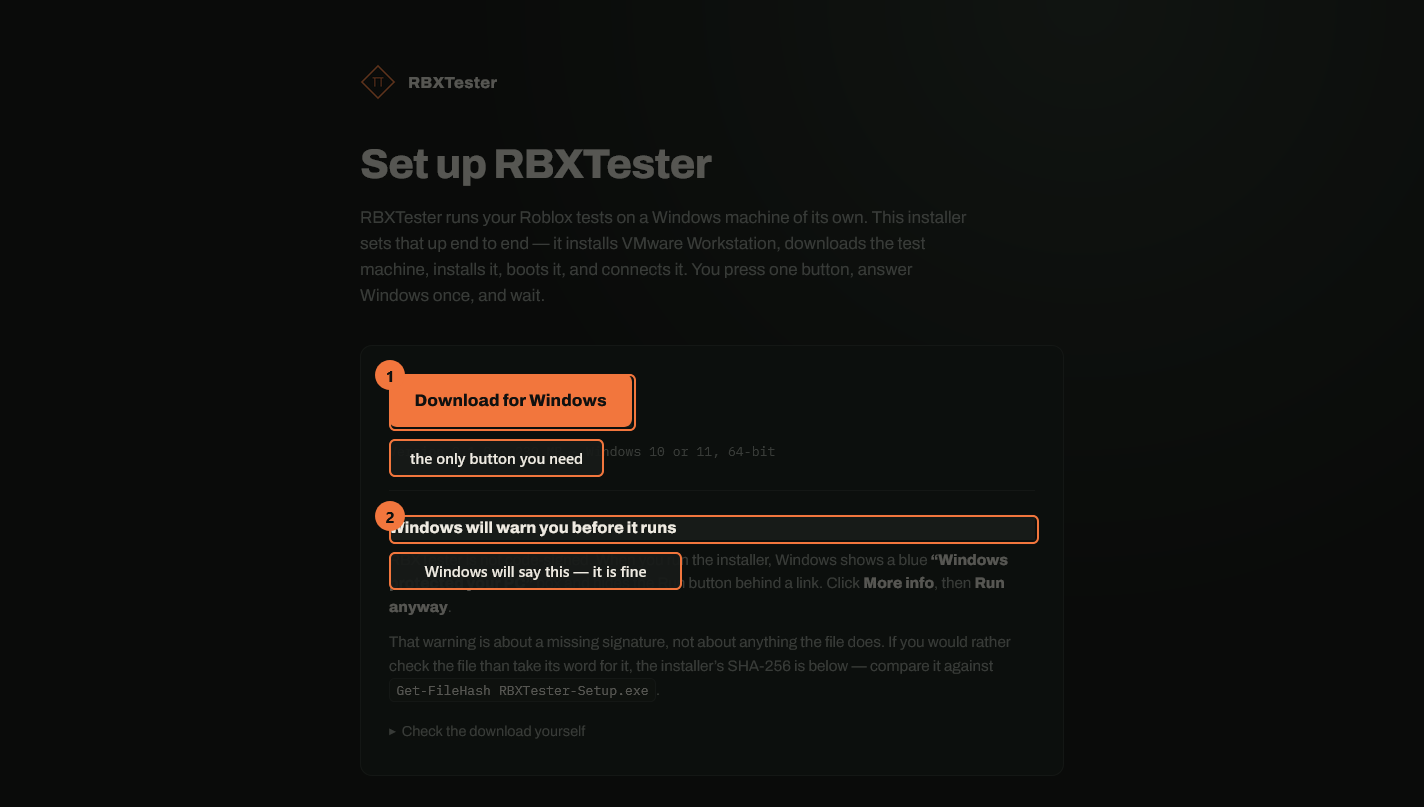
That warning is not a virus warning. It appears because the file has not been bought a signing certificate. There is nothing to type and nothing to check — press More info, then Run anyway, and carry on. (If someone technical ever asks whether the download is genuine, the check under the download button shows a long code that can be compared against it; that is their job, not yours.)
Step 2 · about an hour, mostly waitingLet it build your test machine
Or skip this step: if the test machines should live on a different computer, open RBXTester on that other machine, press Expose this machine in its Setup screen, and copy the pairing code it prints. Then, on this PC, choose Use a remote test machine instead and paste the code. The test machines run over there; the model still runs here. (See Remote gateways in the operator docs for the headless worker and the fine print.)
RBXTester runs your game on a second Windows PC that lives inside your own PC. This step creates that second PC. You only do it once.
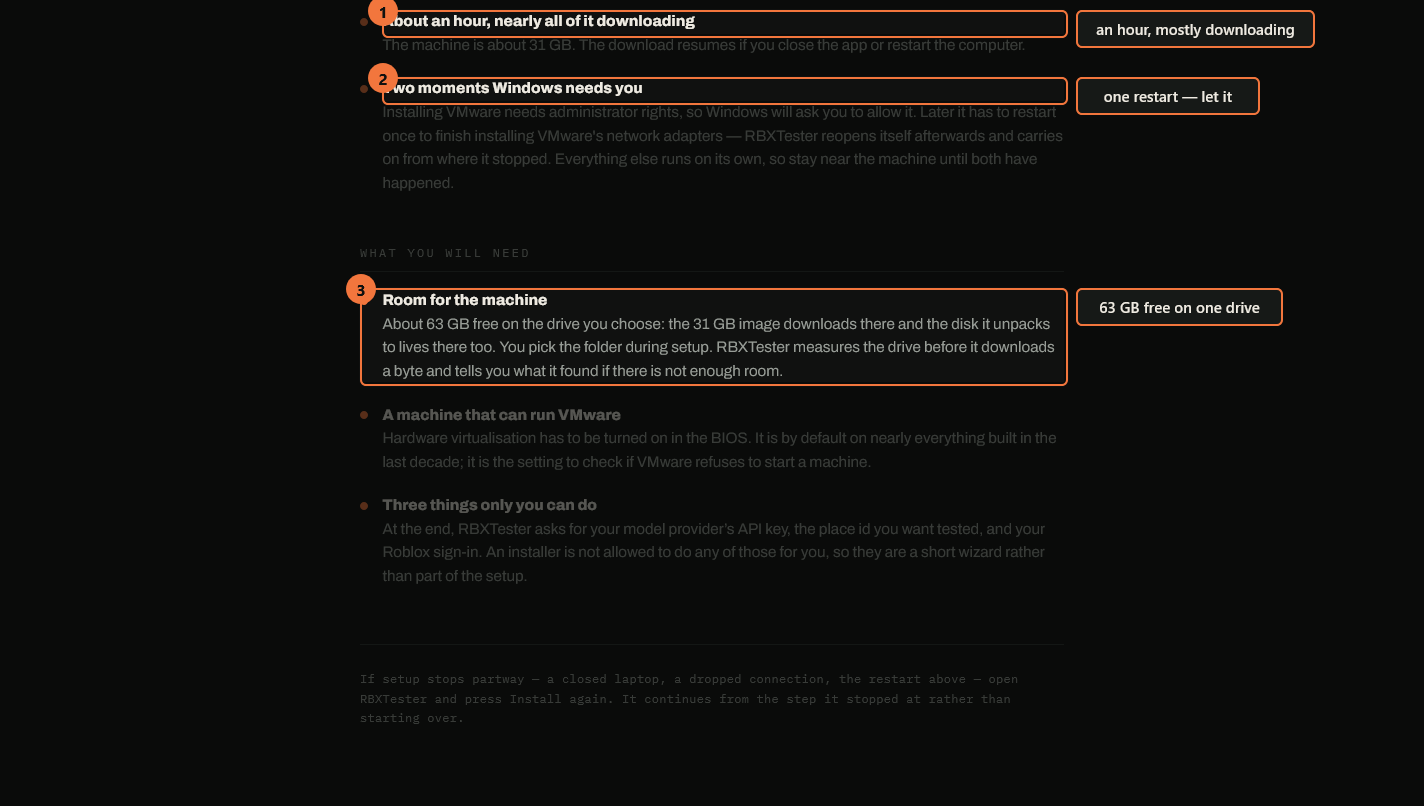
- If Windows asks whether to allow the app to make changes, say Yes. It needs that to install VMware, the program that runs the second PC.
- It asks where the test machine should live. Pick a drive with 30 GB free — it will tell you if there is not enough.
- Now it downloads the machine, about 15 GB. Leave it running and stay near the computer. A good time for coffee.
- Partway through, Windows itself will ask to restart. Let it. RBXTester reopens by itself afterwards and carries on from where it stopped.
If anything interrupts this step — you closed the laptop, the internet dropped, the restart happened — just open RBXTester again and press Install. It continues from the step it reached instead of starting over. Nothing you already downloaded is thrown away.
Step 3 · about 5 minutesSign the test machine into your Roblox account
The test machine has its own copy of Roblox Studio inside it, and it starts out signed out. This step signs it in.
- When setup reaches this point it opens a live view of the test machine — you are looking at its screen, inside a window on your screen.
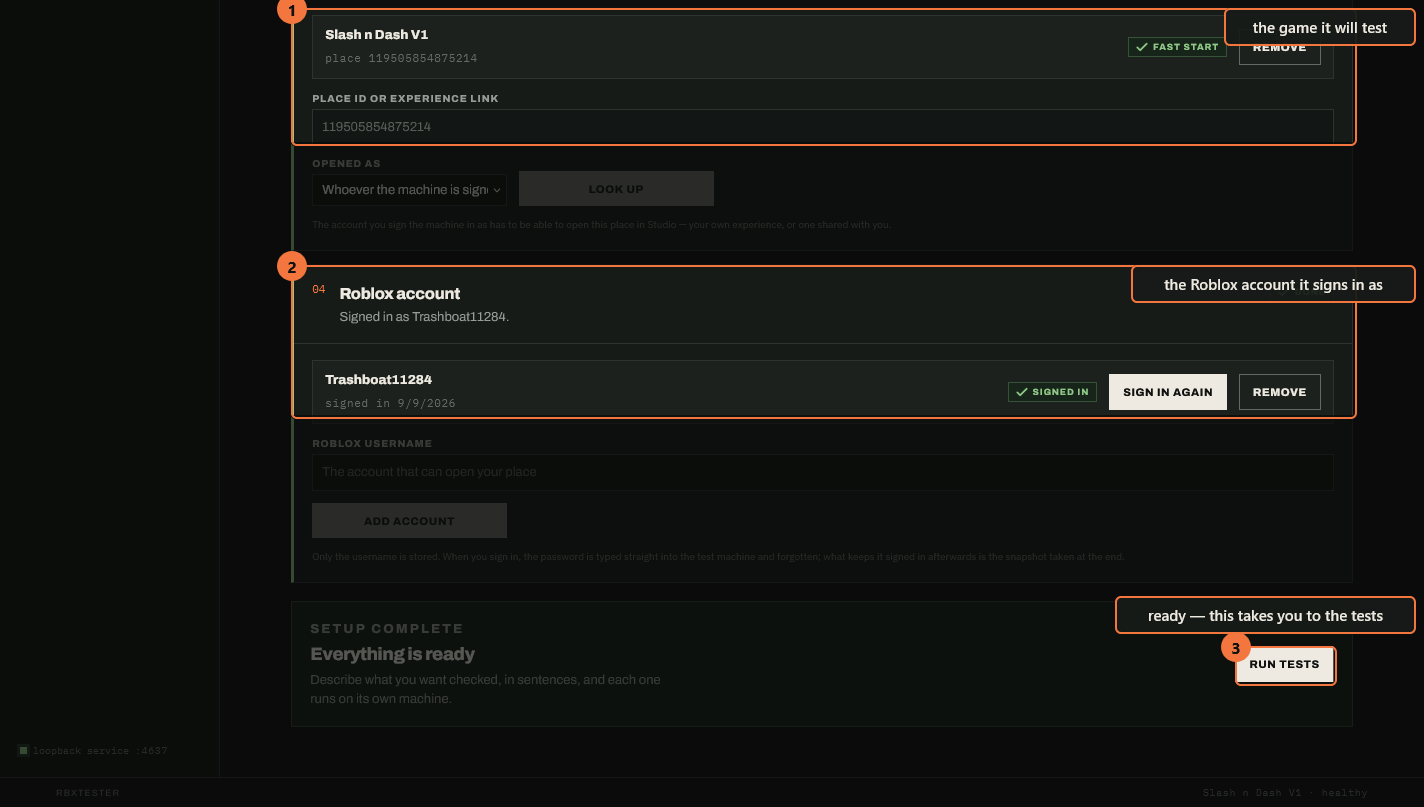
- Sign in there with your Roblox account, exactly as you would on a normal PC. If it asks for a captcha or a two-factor code, do it here. RBXTester cannot do this part for you, and your password is typed in as keystrokes — it is never stored, logged, or written into a test report.
- When Studio shows you signed in, save the snapshot the wizard offers. Every later test starts from that snapshot, which is why it starts in seconds instead of minutes.
Come back to this step if tests start failing oddly. Roblox sign-ins expire after a couple of weeks. When that happens, tests fail with a message about a plugin that never connected. Open RBXTester, sign in again the same way, and save the snapshot again — no reinstall, no downloads.
Step 4 · about 10 minutesPoint it at Claude
This is the part that actually plays your game: Claude looks at each
screenshot and decides what to click, press or type next. It runs on
your Claude subscription, so there is no separate bill and no API key to
buy. If a terminal session is not signed in — for example on a machine
nobody sits at — run claude setup-token in a terminal and
paste the token it prints into Setup's Model step; that works with no
separate Claude Code install.
- If you do not already have Claude Code on this PC, install it and sign in once with the Claude account that has your subscription.
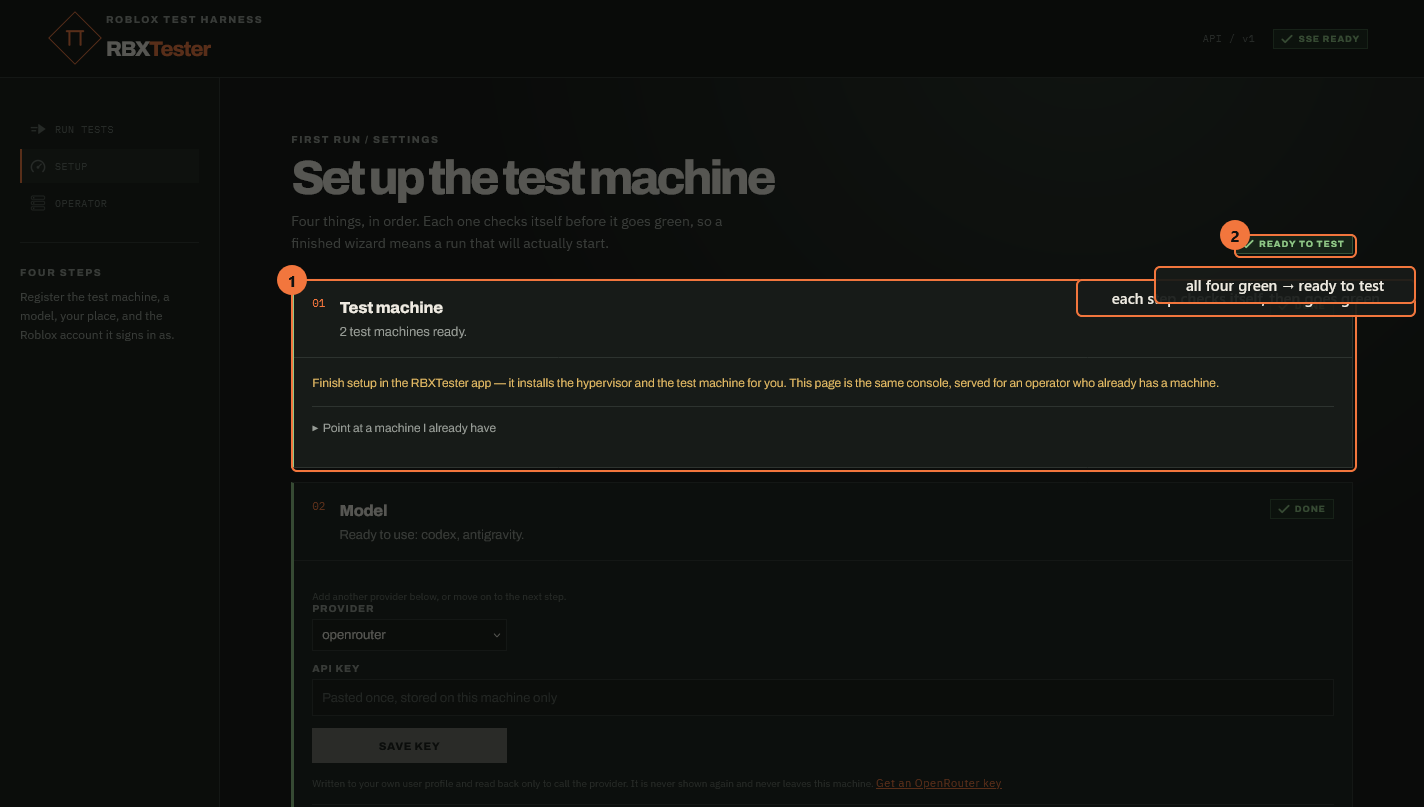
- On the Setup screen, look at step 02 Model. When it is green, the wizard already found your sign-in — there is nothing to paste, and no API key to buy.
-
In Run tests, choose the Claude model you want from
the Model list —
fable,opus,sonnetorhaiku. You pick it once; every test uses it afterwards.
There is no key to buy and nothing to type: the tests run on the subscription you already pay for. If the Model step is not green, it says why in a sentence — usually that Claude Code has not been signed in on this PC yet, which is the one thing above to go and do.
Step 5 · a few minutesGive it your game
-
Open your game’s page on roblox.com and
copy the whole web address — something like
roblox.com/games/1234567890/My-Game. Paste it where RBXTester asks for your place. It looks the game up and shows you its name, so you can see at a glance that you picked the right one. (If you already know your place id — the long number in that address — you can paste just the number instead.)
Step 6 · every time after thisStarting it and running tests
This is the part you will do over and over. Setup above happens once; everything below is ordinary use.
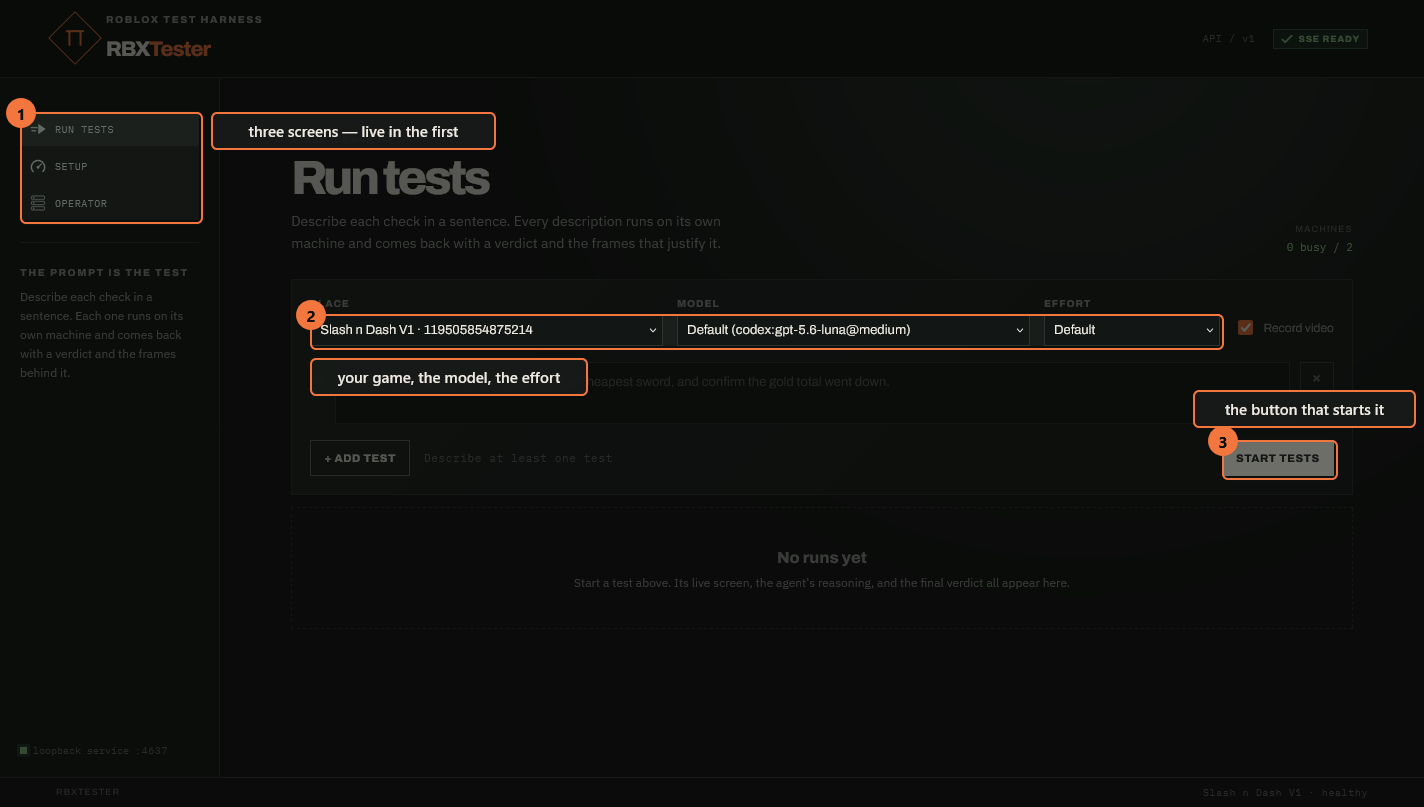
- Open RBXTester from the Start menu — search for it by name. A window opens; that window is the tester, so leave it open while tests run. Closing it stops whatever is running.
- Down the left side there are three buttons: Run tests, Setup and Operator. You live in Run tests. Setup is the wizard from steps 2–4, if you ever need to redo part of it. Operator is the old machinery — you can ignore it.
- At the top of Run tests, check three things: your Place, the Model that plays the game (step 4), and Effort, which you can leave on Default. Record video is optional — tick it if you would like a video of the run as well as the screenshots.
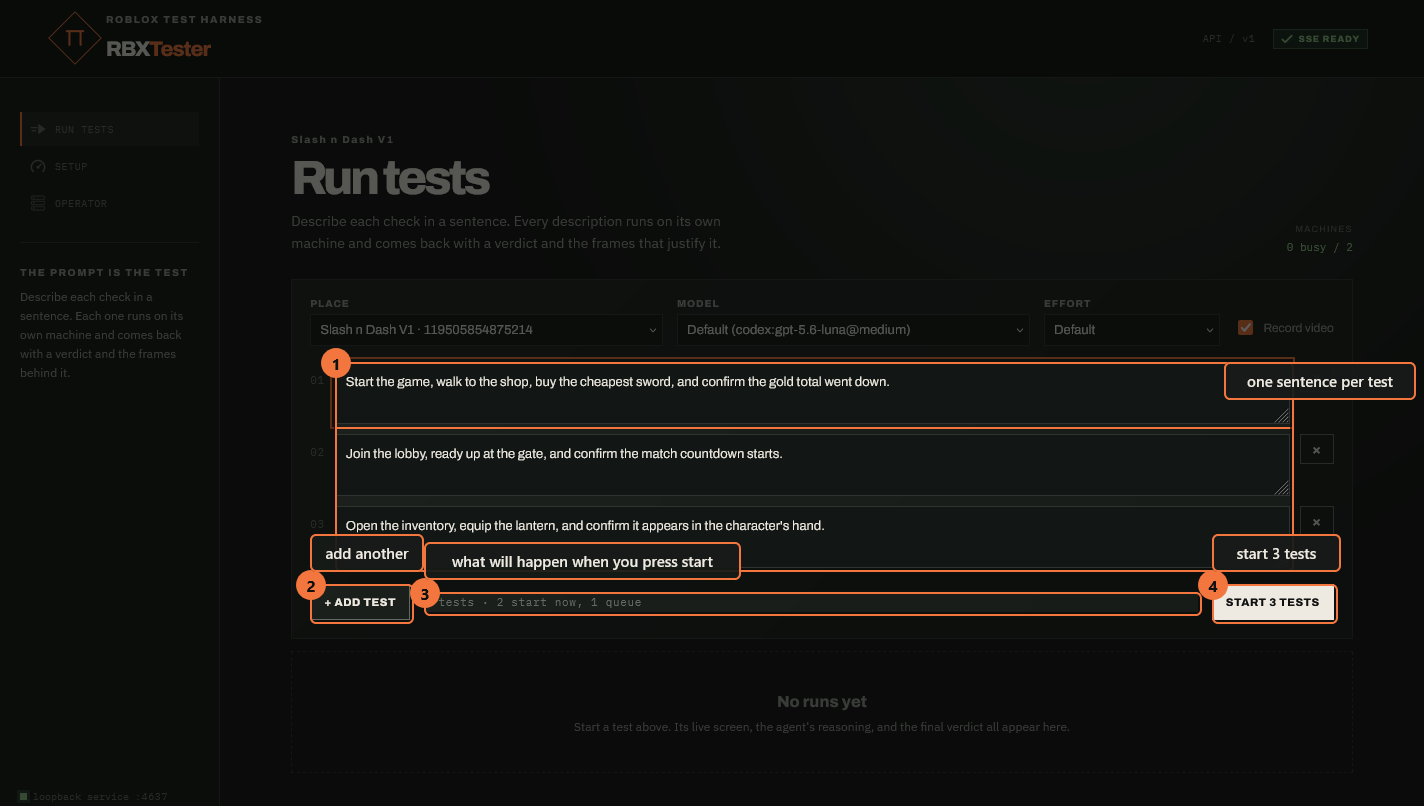
- Type what you want checked in the numbered box, as a sentence or two, the way you would describe it to a friend: “Open the shop, buy the cheapest sword, and confirm it appears in my inventory.” Each box is one test. Press + Add test for another, and the × beside a box removes it.
- Press the button at the bottom right. It says how many tests it is about to start — Start 3 tests — and the line beside it tells you what will happen: “3 tests · 2 start now, 1 queue”. Each test needs a test machine of its own, so with one machine they run one after another, and the queued one starts as soon as a machine frees up.
Writing good sentences
Say what “working” looks like — a number, a label, a screen it should reach. “The loot panel shows exactly three items” is a good check; “test the loot system” is not, because there is nothing on screen for it to confirm. If a check fails, read the screenshots before changing the game: sometimes the game is fine and the sentence was ambiguous.
Step 7 · while it runsWatching a test work
Every test you start gets its own card underneath, and the card fills in as the test goes. Nothing here needs your attention — it is how you find out what happened when you come back.
- The live screen — what the test machine is looking at right now. For the first minute or so the card says “First frame pending” while the machine wakes up; that is normal, not a hang.
- Agent reasoning — one sentence per step, in plain English, saying what it is about to do and why. This is the best part to read: when a test goes wrong, the reasoning usually says exactly where the game confused it.
- Action log — the other half: the actual clicks, keys and movements it played, in order, with their timings.
- Turns counts those steps. A short test is 5–15 turns; a long one can be 40. A test that sits still is waiting on something — Idle deadline shows how long it will wait before it gives up and reports back.
- Abort session stops one test immediately. Nothing is thrown away: the reasoning and screenshots up to that moment stay on the card.
Step 8Reading the result
- The card ends with FINAL VERDICT: passed, failed or inconclusive.
- Under the verdict are the evidence screenshots it based that on, each with a sentence explaining what it shows. These are the point of the whole thing — a failed test here comes with a picture of the moment it failed.
- Inconclusive means it could not tell, usually because the sentence asked for something that never appears on screen. Rewrite the check and run it again; that is cheap.
- Every test is also kept as a full record on your PC — screenshots, the reasoning for every step, and the verdict — so you can compare a run today with one from last week.
If something goes wrong
- “Windows protected your PC” — expected. More info, then Run anyway.
- VMware refuses to start a machine — virtualisation is switched off in your PC’s BIOS. It is on by default on almost everything made in the last decade; it is the one setting to look for if setup stalls here.
- A test fails with “its MCP plugin never connected” — your Roblox sign-in inside the test machine has expired. Do step 3 again.
- Setup stopped partway — open RBXTester and press Install. It resumes.
- Everything looks stuck for a long time — check the download is still moving. 15 GB over a slow connection is genuinely slow, and the machine is a full Windows PC, not a small program.
- A test sits on “First frame pending” and never starts — give it two or three minutes; waking the machine is slow. If it still has not started, open the Setup screen on the left and see what it says about your machine.
- You closed the window mid-test — the app is the tester, so that stops it, and reopening does not resume it. Start that test again. Nothing else is harmed.
- You want more detail than the cards show — the Operator screen on the left has the machine list, logs and job history. You do not need it for normal use.